Generally feature settings are included in a GPX file export from this app and will be reinstated by a load from the same GPX file. Some settings are part of the GPX specification and will preserve between different apps and others are app family specific. In particular these app settings are all preserved between iPhone and Android versions of this app and Freshmap versions.
Selected the track log of a short walk near Christchurch. A border is drawn around the track to make it stand out a bit.
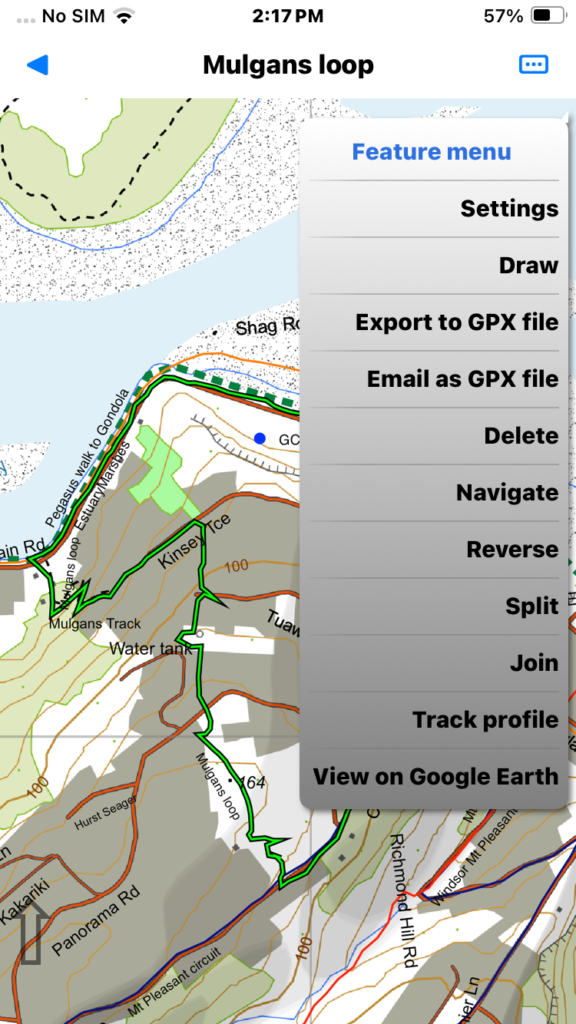
Choose the “Settings” menu item
Because this is a GPS recorded track there is a summary of the recorded details at the top.
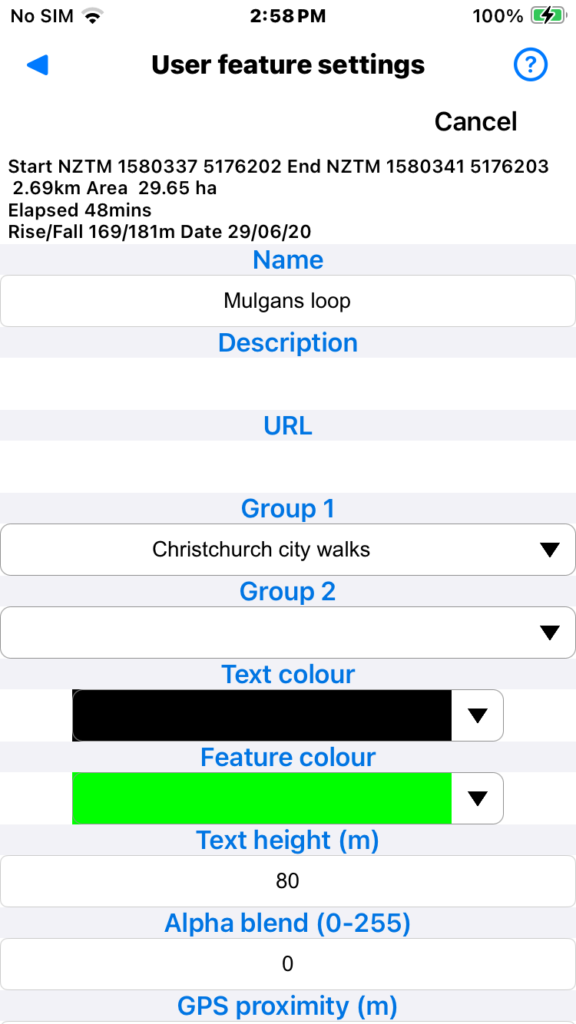
- Name: Choose any name. GPS recordings get a default name including the date. This will be shown on the map as a label unless hidden as per check box below.
- Description: Any description you want. This is optionally displayed when you tap on the feature in the map.
- URL: You can enter any URL here. If a feature has a URL and the app is online there will be a selected feature menu option to fetch the page.
- Group 1, Group 2: A simple way to group features. Either enter any text or choose from used groups via the drop down arrow.
- Text colour: Label colour. Tap drop down arrow to list used colours or tap coloured bit to select any colour. This is the colour of the feature label displayed on the map.
- Feature colour: Line colour. As above. This is the colour of the line displayed on the map.
Continued from previous image.
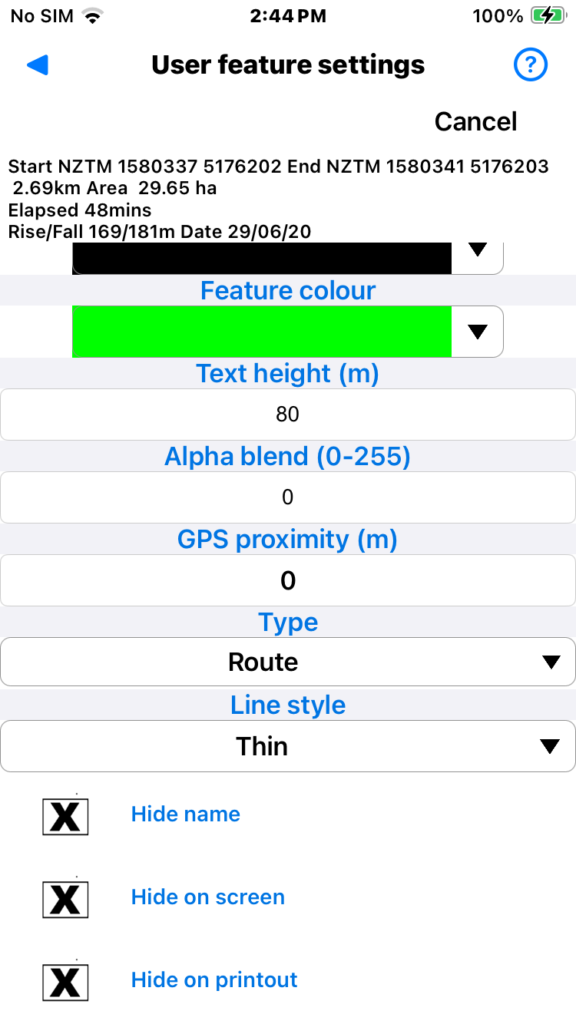
- Text height: Nominally in metres but scaled according to zoom for readability.
- Alpha blend: Value 0-255 to make track log semi-transparent (higher => more transparent)
- GPS proximity: Specifies navigation margin for voice navigation (metres).
- Type: Either Route or Track.
- Line style: See next image for choices.
- Hide name: Check to hide feature name label on map and printout.
- Hide on screen: Hide the feature on screen. Useful when you have multiple track logs you want to keep but not show.
- Hide on printout: Hide feature on printout.
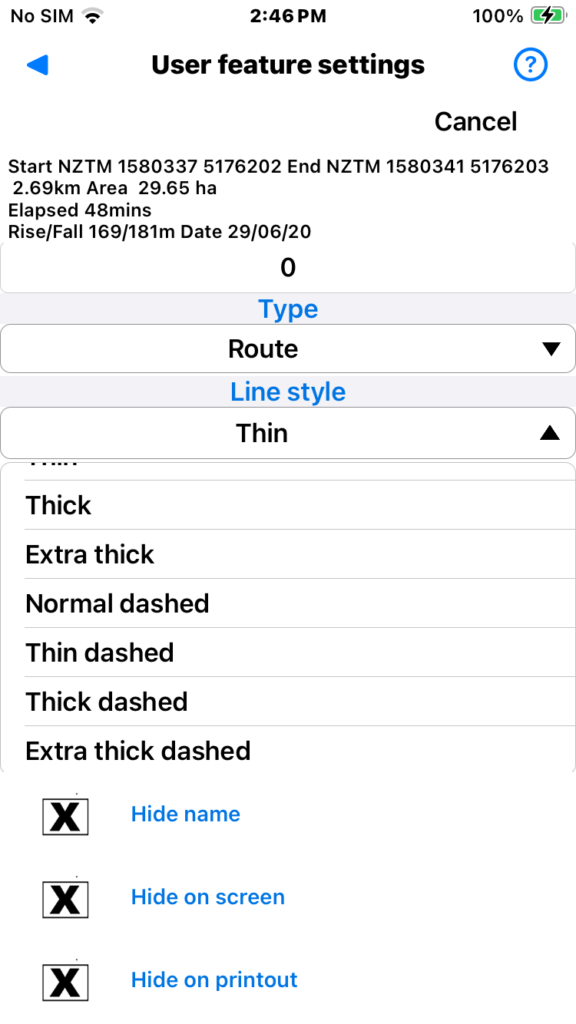
Screen shot to show some of the line style choices.
Now we have selected a point feature (a geocache) near the short walk. Note the border to indicate selection.
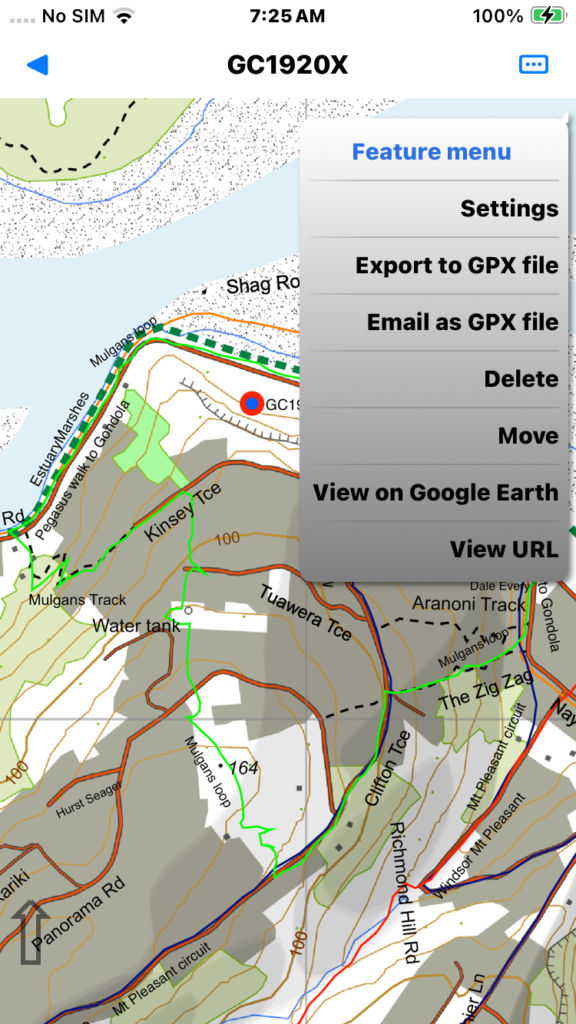
Choose the “Settings” menu item.
There are a few differences in point feature settings. The location of the point is shown at the top.
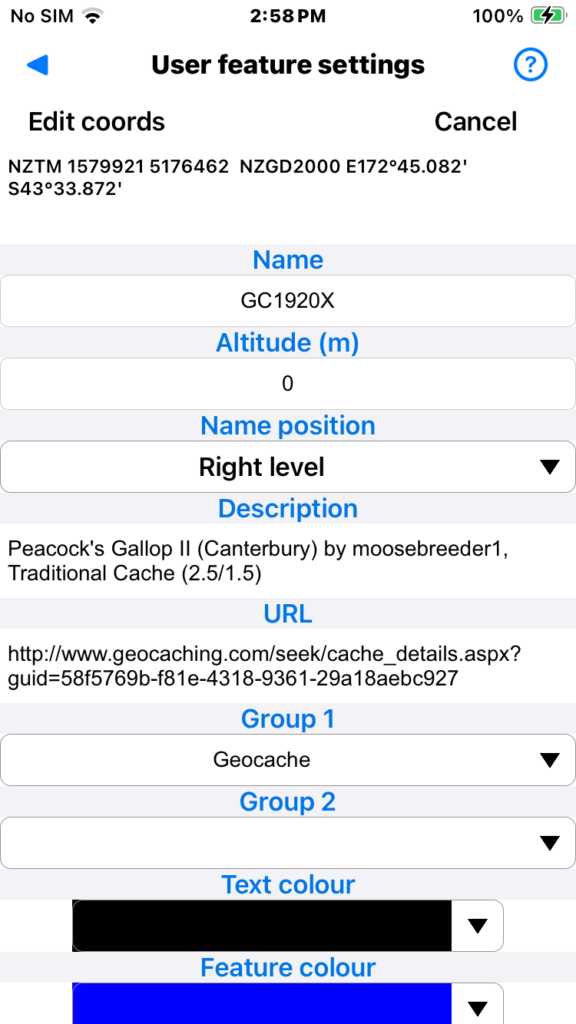
- Edit coords: If you need to correct the location of the feature tap the “Edit coords” button.
- Most other properties are the same as for track features above except :
- Altitude: This will be pre-filled if created via GPS menu or by context menu on the map. Otherwise you can enter it if you want.
- Name position: Specify the preferred name label position relative to the point feature. Default is “Right level”. The app will use this if the name fits there without conflicting with other text. Otherwise the app will look for another position.
Point feature settings continued:

- Rest of the settings are the same as for track features above except for:
- GPS proximity: If feature is type “Guidance” and voice navigation is running then the feature name and description will be read out when you reach the proximity distance (metres) from the feature.
- Type: A few point types to choose from. You can use this as a feature selection criteria.